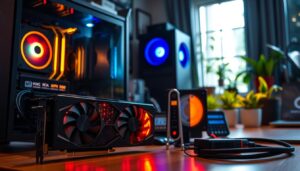
I’ll walk you through a friendly, step-by-step guide that shows how to push your GPU for higher frame rates without risking damage.
I start by explaining core and memory clock concepts so you understand what each setting does. Then I show safe testing methods and the best software tools I use to monitor temperature, power, and stability.
This method keeps your gaming experience smooth while protecting lifespan and avoiding common issues like thermal throttling or power limits. Every gpu reacts differently, so I explain how to find the right balance for your specific hardware and time investment.
Expect practical tips on tuning core and memory frequencies, running stress tests, and returning to default settings if you hit problems. By the end, you’ll know how to increase speed in a way that respects heat, power, and long-term performance.
Key Takeaways
- I explain core clock and memory tuning to boost performance safely.
- Use step-by-step testing and monitoring software to protect your hardware.
- Manage temperature and power to avoid damage and preserve lifespan.
- Every gpu is different—expect varying results and adjust settings gradually.
- Return to default settings if stability or heat become an issue.
Understanding the Basics of GPU Overclocking
Before you tweak any settings, you need a clear idea of what clock speed actually measures. Clock speed defines the number of processing cycles per second your graphics card can handle under load. In simple terms, it tells you how many operations run every second, often shown in MHz.
What is Clock Speed
Clock speed is the rate at which a gpu executes cycles per second. Raising that rate increases raw throughput and can yield higher fps in many games.
Benefits of Higher Frame Rates
The main gain from gpu overclocking is smoother, more responsive gaming and improved performance in demanding scenes. I always remind readers that higher clock and memory speeds push heat and power up, which can cause stability issues if you aren’t careful.
- Test gradually: increase clocks in small steps and run stress tests.
- Watch temperatures: keep an eye on thermal limits and system cooling.
- Know your hardware: silicon varies, so results differ between cards and chips.
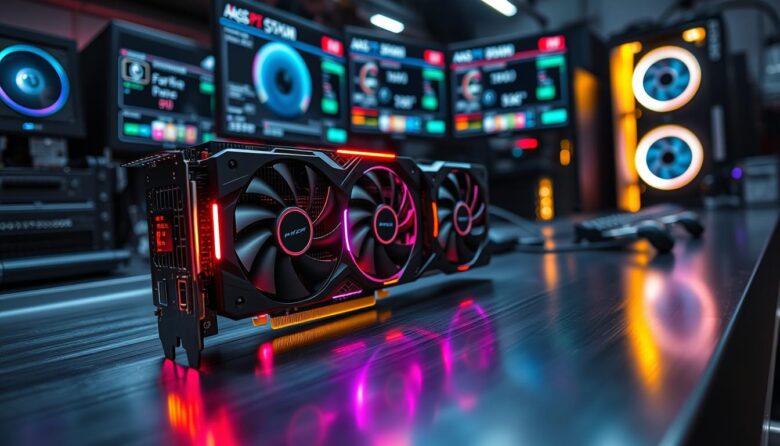
Essential Tools for Your Overclocking Journey
The right utilities make tuning faster, safer, and more precise. I rely on reliable monitoring and tuning software before changing any clock or memory settings.
I recommend MSI Afterburner first. It works with both NVIDIA and AMD graphics cards and shows real-time temperature, MHz, and power draw.
For card-specific tweaks, consider NVIDIA Inspector or AMD Radeon Performance Tuning. Each tool can expose extra settings for fine control.
- Download from official sites: avoid fake installers that can damage your hardware.
- Use beta builds when supported; they often add compatibility for new gpus.
- Monitor per second performance to spot instability during gaming or stress tests.
Having the right software is the first step to safe overclocking. These tools let you track stability, adjust core and memory, and protect lifespan while chasing better performance.
Preparing Your System for Peak Performance
Before you touch any tuning sliders, make sure your PC’s software layer is lean and stable. I always clean up unnecessary apps and background tasks so the gpu and cpu can focus on rendering.
Optimizing Software Environments
Start with a software check. I run cleaners and a maintenance tool like AVG TuneUp to stop services that steal cycles.
Next, I update drivers for my gpus and ensure the OS has the latest patches. Updated drivers often bring small performance gains that stack with manual tuning.
Check power and stability: confirm your power supply can handle added load before changing core or memory settings. A solid PSU prevents crashes when you push performance.
- Trim background apps so benchmarks reflect real gains.
- Use AVG TuneUp or similar to streamline startup items and services.
- Keep drivers current to complement your manual adjustments.
This step builds a stable foundation and helps you tell genuine tuning wins from routine maintenance. I find a well-prepared system makes testing safer and more rewarding.
How to Safely Overclock Your Graphics Card
I’ll guide you through small, controlled tuning steps that boost frame rates but protect your components.
Start slow: raise the core clock in tiny steps, about 10 MHz at a time, or roughly a 5% increase to check stability.
Use MSI Afterburner to change core and memory settings while you monitor temp and load in real time.
After each tweak, run a short stress test and look for visual glitches or streaks. If you see any artifacts, lower the clock immediately.
- Increase power limit first to give the gpu headroom.
- If your system crashes, reboot and drop settings by 10–20 MHz.
- Ensure cooling is adequate; added heat shortens lifespan if ignored.
| Step | Change | Check |
|---|---|---|
| 1 | Raise core +10 MHz | Run 5–10 min stress test |
| 2 | Raise memory if stable | Watch for artifacts |
| 3 | Adjust power limit | Monitor temperature & stability |
| 4 | Find sweet spot | Confirm with gaming and benchmarks |
Take your time. My guide is a steady way to improve gaming performance without risking damage to your hardware.
Monitoring Temperatures and Stability
I track heat and system stability constantly to spot problems before they cause crashes or damage. Good monitoring helps me balance higher performance with long-term hardware health.
Identifying Thermal Throttling
Thermal throttling happens when a gpu reduces its clock speed to cut temperature. That drop kills frame rates and feels like sudden stutter in gaming.
Keep both gpu and cpu temps below 90°C to avoid lasting damage. If clocks fall under load, lower your settings or improve cooling.
Recognizing Graphical Artifacts
Artifacts—flicker, strange colors, or geometry errors—mean your tuning is too aggressive. These issues appear during a reliable gpu stress run.
If you see artifacts or frequent crashes, step back by 10–20 MHz and re-test. Confirm fan operation and check your monitoring software for spikes.
| Metric | Safe Range | What to Do |
|---|---|---|
| GPU Temperature | < 90°C | Improve airflow or lower clocks |
| Performance Drops | Sudden FPS loss | Check for thermal throttling |
| Visual Artifacts | Any occurrence | Reduce memory/core and re-run stress |
Adjusting Core and Memory Clock Speeds

Fine-tuning core and memory frequencies is where you’ll see the most tangible fps gains. I recommend starting with the core clock modestly, then moving to the memory clock once stability is proven.
Memory clock boosts VRAM frequency, which matters most in high-resolution textures and heavy texture streaming. For many gpus, even small memory gains improve real-world performance.
I suggest raising memory clock in 50–100 MHz steps and testing after each change. Never adjust core and memory at the same time. Doing both makes it hard to find the source of any issues.
- Record a baseline before you start so you can measure gains.
- Test each change with short stress runs and a real game scene.
- If instability appears, revert to the last stable setting and try a smaller increase.
Remember the Titan Xp runs up to 1,582 MHz on its GPU chip, so know your hardware limits. This step is the heart of safe tuning and helps you squeeze better performance while protecting lifespan.
Managing Power Limits for Better Results
A smart power limit tweak often unlocks steady performance when core and memory speeds start to wobble.
Increasing the power limit lets your gpu draw more wattage from the PSU so higher MHz can stick under load.
Modern gpus often lock voltage adjustments to prevent damage, so you’ll mostly rely on power limit changes and careful clock tuning.
Understanding Voltage and Power Draw
I use MSI Afterburner to raise the power limit first. A 10%–20% bump usually gives enough headroom to stabilize higher core clock and memory clock settings.
Be mindful: more power means more heat and higher power consumption. If temps climb, back off the settings or improve cooling.
- Monitor power draw: watch PSU load while gaming to avoid overloads.
- Avoid high voltage edits: modern hardware can be damaged by excessive voltage.
- Balance power and clock: more watts won’t help if your gpu is already thermally throttling.
| Action | Recommended Change | Watch | When to Roll Back |
|---|---|---|---|
| Increase power limit | +10% to +20% | Power consumption & temps | Temps exceed safe range or instability |
| Adjust clocks after power | Small core or memory steps (10–50 MHz) | Artifacts, crashes | Visual glitches or crashes |
| Voltage tweaks | Generally avoid | Manufacturer caps & warnings | Any sign of component stress |
| PSU check | Ensure headroom | System wattage under load | PSU near max capacity |
Careful power tuning is an essential step. It helps me push performance while protecting lifespan and avoiding common issues during gpu overclocking.
Testing Your Overclock with Benchmarking Software
The final proof of a stable tune is a long, focused benchmark that pushes your gpu the way modern games do.
I rely on 3DMark and FurMark as my primary gpu stress test tools. They simulate heavy loads and reveal instability that short gaming sessions often miss.
Run a benchmark for several hours to confirm long-term stability. Watch temperatures and power draw closely during the run.
Compare scores before and after to measure real performance gains. If your result shows artifacts or crashes, reduce MHz or revert to the last stable setting.
- I document clock speeds, memory values, temps, and scores for each test.
- Long runs expose hidden faults that short playtests can hide.
- A successful tune passes these rigorous tests without visual glitches or reboots.
Testing is the last step in the process. It gives you confidence that your settings will hold up during intense gaming and that the system runs safely under sustained stress.
Common Mistakes to Avoid During the Process

Small, steady changes beat big leaps when tuning performance. Rushing frequency increases often causes crashes and wastes time. Take measured steps and test as you go.
Pushing Frequencies Too Fast
One of the biggest errors is cranking the core clock or memory clock by large amounts. Sudden MHz jumps can produce artifacts, reboots, or permanent damage.
Tip: I raise clocks in tiny steps and use msi afterburner to monitor behavior after each change.
Neglecting Long Term Stability
Passing a short benchmark isn’t enough. A setting that runs for five minutes might fail after an hour of gaming.
Run an extended gpu stress test and verify stable frame rates, temps, and power over time.
Ignoring Cooling Limitations
Heat is the usual culprit when a tune fails. If your cooling is marginal, higher clock speed only triggers throttling and lower real-world performance.
Always watch temperature and power draw. Improve airflow before chasing extra speed.
- Increase settings slowly and document each step.
- Use long stress runs to confirm stability.
- Respect thermal and PSU limits to avoid damage.
Overclocking Laptop Graphics Cards
Laptop tuning demands a different mindset because the chassis and fans set hard limits on what you can safely push.
I’ve boosted frame rates on my Surface Book with a GeForce 965M GTX by about 25%. That was with careful, small gains and steady monitoring.
Mobile gpus reach thermal limits fast. Use MSI Afterburner to watch temps and clocks in real time. Higher clock and memory speed will raise power draw and cut battery life.
Keep ventilation excellent. Place the laptop on a hard surface, clear vents, and consider a cooling pad. Overheating can cause sudden reboots or permanent damage.
Always test stability with a solid stress run after each step. If you see artifacts, crashes, or steep temp rises, stop and back down.
“Small, patient tweaks give the best gains on laptops—rush and you risk hardware or poor long-term performance.”
- Start with tiny MHz steps and monitor temps.
- Expect limited headroom compared to desktop gpus.
- Stop immediately if instability or excessive heat appears.
Deciding Between Manual Tuning and Factory Overclocked Cards
Deciding whether to tune settings yourself or buy a factory-tuned model comes down to time, skill, and goals. I weigh how much effort I want to spend against the gains I expect.
Factory-overclocked models, like the MSI Lightning Z, arrive with stronger power delivery and better cooling. They often hit higher stable speeds out of the box and reduce setup time.
Manual tuning lets me chase the absolute limits of my specific gpu. Small MHz steps, careful testing, and patience usually squeeze extra performance beyond factory presets.
- Factory models = convenience and robust cooling.
- Manual tuning = tailored maximum performance for your chip.
- Budget and comfort with hardware should guide your choice.
| Approach | Pros | Cons |
|---|---|---|
| Factory-tuned | Better cooling, tested presets, plug-and-play | Less headroom for extra tuning |
| Manual tuning | Potential higher final speed, personalized settings | Time-consuming, needs testing |
| Hybrid | Start with factory, fine-tune carefully | Requires care to avoid instability |
Whether you buy or build, the goal is the same: reliable, higher frame rates from your system. I find factory-overclocked models make a great starting point, but manual tweaks are where I get the most reward.
Conclusion
, Finally, a patient approach lets you gain real performance without risking your hardware.
I showed how to safely raise clock speed and memory settings, test each step, and watch temps closely. Use small steps, continuous monitoring, and sensible power limits to keep your system stable.
By managing cooling and power, you can squeeze 10–20% more performance in many games. My guide on gpu overclocking and how to overclock gpu gives the steps you need to start confidently.
Always prioritize long-term health, and dial back settings at the first sign of instability. Now take what you learned and begin your tuning journey toward better speed and lasting results.
FAQ
What does clock speed mean for my GPU and why does it matter?
Clock speed is the rate at which the GPU core processes instructions, measured in MHz. Higher clock speeds usually raise frame rates in games and benchmarks, but they also increase heat and power draw. I always balance speed gains with temperature and stability to avoid shortening hardware lifespan.
Which tools do I need to tune core and memory clocks safely?
I use MSI Afterburner for clock, voltage, and fan control, GPU-Z to monitor sensors and clocks per second, and a stress test tool like 3DMark or Unigine Heaven to verify stability. Those programs give me clear feedback on temps, power consumption, and performance.
How do I prepare my system before starting adjustments?
I update GPU drivers, close background apps, ensure good airflow in the case, and set a consistent power plan in Windows. I also record stock clock speeds and temperatures so I can revert if anything goes wrong.
What’s a safe step-by-step approach to increase clock speed?
I raise the core clock in small increments (10–25 MHz), run a short stress test after each change, then monitor for artifacts or crashes. After core, I increase memory clock similarly. If instability appears, I back down to the last stable value and run a longer stress test.
How should I monitor temperatures and know when thermal throttling happens?
I watch GPU temperature and clock behavior in real time with MSI Afterburner or GPU-Z. Thermal throttling shows as a sudden drop in clock speed while temps are high. If that happens, I improve cooling or lower clock/voltage until clocks stay stable under load.
What are graphical artifacts and how do I detect them?
Artifacts include flickering, odd textures, purple or green pixels, and screen tearing beyond normal V-Sync issues. I spot them during stress tests or gameplay; they signal instability from too high core or memory frequencies or insufficient voltage.
How do I manage power limits and voltage safely?
I increase power limit first to allow higher clocks without hitting the card’s cap, then adjust voltage only if needed for stability. I avoid excessive voltage because it raises temperatures and reduces component lifespan. Monitoring power draw and temps per second helps me stay safe.
How long should I stress test a new setting to confirm stability?
I run an initial 10–20 minute stress test after each change, then a full 1–3 hour session for a final validation. For long-term confidence, I also play demanding games for an hour or two to confirm real-world stability.
What common mistakes should I avoid when tuning my GPU?
I avoid increasing frequencies too fast, neglecting long-term stability checks, and ignoring cooling limits. I also don’t rely solely on synthetic benchmarks—real gameplay testing is essential to catch issues.
Can I tune a laptop GPU the same way as a desktop card?
Laptop GPUs are more thermally constrained, so I’m much more conservative there. I favor small frequency bumps, aggressive fan profiles, and sometimes undervolting to improve sustained performance without excessive heat.
Should I choose a factory-overclocked model or do manual tuning myself?
Factory-overclocked cards offer a safe, tested boost out of the box, which saves time. I choose manual tuning if I want extra performance beyond that, but it requires more monitoring and care to maintain longevity.
Will increasing memory clock or core clock give better gaming results?
It depends on the game and GPU. I find core clock increases often help frame rates more in GPU-bound scenes, while memory clock boosts matter for high resolutions or bandwidth-heavy workloads. I test both to see which yields the best improvement per MHz.
How much extra power does tuning typically add, and how does that affect my PSU?
Small clock increases add modest power draw, but aggressive tuning and higher voltage can significantly raise wattage. I ensure my PSU has headroom and stable rails before pushing power limits to prevent system instability.
Could tuning reduce my GPU’s lifespan or cause damage?
If I keep voltages within safe limits, maintain good cooling, and avoid sustained extreme temps, the risk is low. Pushing voltage and heat too far can shorten component life, so I prioritize stability and thermals over chasing every MHz.
How do I recover if my system crashes during a test?
I reboot, boot into safe mode if needed, and reset settings in MSI Afterburner to defaults. If the BIOS or firmware setting caused an issue, I restore defaults there too. I then try smaller adjustments and longer stability checks.
What metrics do I track per second while stress testing?
I monitor GPU clock, memory clock, temperature, power draw, and fan speed per second. Tracking those values lets me spot transient spikes, throttling events, or instability that short tests might miss.
Any tips to keep my system cool while tuning?
I optimize case airflow, use quality thermal paste if reapplying, raise fan curves in software, and consider aftermarket coolers or adding case fans. Better cooling usually yields higher stable clocks with less noise.

Ethan is a lead GPU reviewer and hardware analyst with a passion for pushing silicon to its absolute limits. With a background in computer engineering, he spends his days building custom test benches, analyzing frame-time graphs, and breaking down complex GPU architectures. When he’s not benchmarking the latest NVIDIA and AMD releases for VN Pixel, he is likely tweaking his custom-loop water-cooling setup to achieve the perfect overclock.